SymptomsApp server's service stops, and in order to start the service again, the customer need to do it manually |
Example from one our customer from Italy:
Fix 1: Disable SuperFetch
SuperFetch helps to decrease boot time and make must-load programs more efficiently. However, it has been identified as a potential cause of disk performance issues in Windows 8 and later versions of Windows, including Windows 10. Here’s how to stop this service:
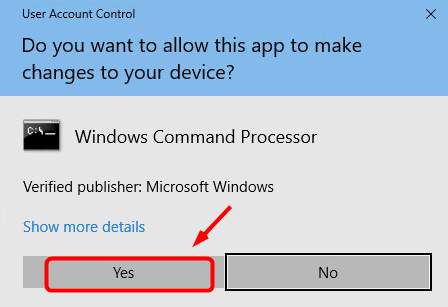
1) On your keyboard, press Windows logo key, type command prompt, then select Run as administrator.
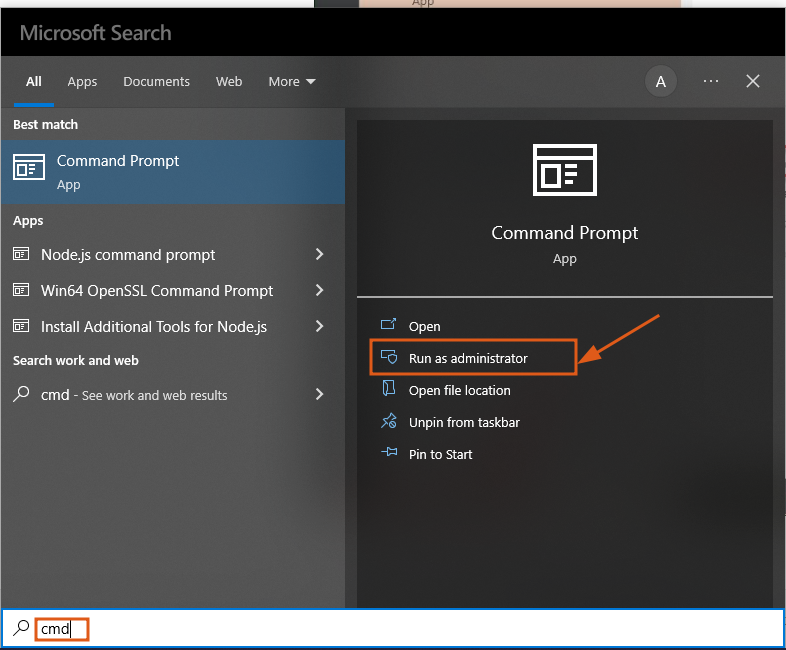
2) Click Yes at the User Account Control prompt.

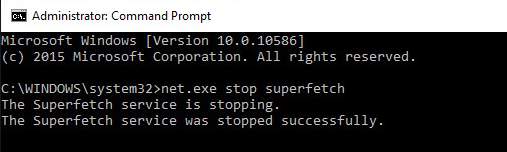
3) The command prompt will once again display. Type in the following command:
net.exe stop superfetch
4) Hit Enter on your keyboard.
5) If the command above isn’t valid, try the following one instead:
net.exe stop sysmain
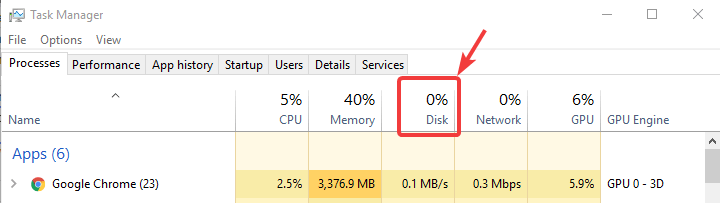
6) Wait for a few minutes to see if your computer starts performing better. Or check your computer’s disk usage: Type “task manager” in the Windows search bar and select Task Manager, then in the Processes tab, look at the % at the top of the Disk column. If it’s no longer 100%, you’ve fixed the problem!
If the 100% disk usage problem persists, try the next method, below.
Fix 2: Perform a disk check
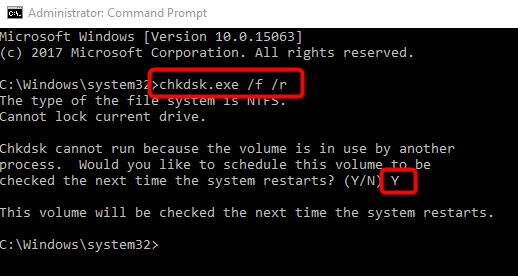
1) On your keyboard, press Windows key and X at the same time, then choose Command Prompt (Admin).
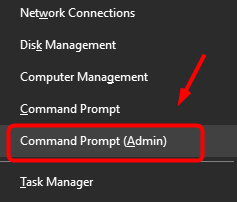
2) Click Yes at the User Account Control prompt.
3) The command prompt will once again display. Type in the following command:
chkdsk.exe /f /r
4) Hit Enter on your keyboard, then type Y to confirm that you’d like to perform the disk check the next time you restart your computer. Please make sure you have closed all of your applications first.
IMPORTANT: Disk check will start the next time you boot your PC and it might take some time to complete (could be a day for some). If, when you restart, you don’t have time to wait for the disk check to complete, you can skip it. You’ll need to reschedule it again, as described above, though.
5) Once you’ve completed the disk check, check your computer’s disk usage again: Type “task manager” in the Windows search bar and select Task Manager, then in the Processes tab, look at the % at the top of the Disk column. If it’s no longer 100%, you’ve fixed the problem!
If the 100% disk usage problem persists, try the next method, below.
Fix 5: Reset Virtual Memory
Virtual memory can be considered an extension of your computer’s physical memory. It’s a combination of RAM and a portion of your hard drive. When the RAM isn’t enough to perform a task, Windows will temporarily store files in virtual memory, then swap them back to RAM when required.
To reset virtual memory:
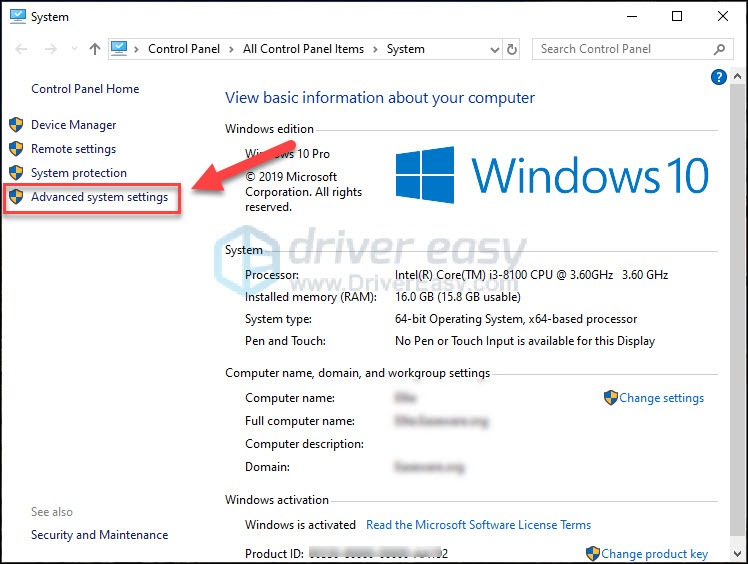
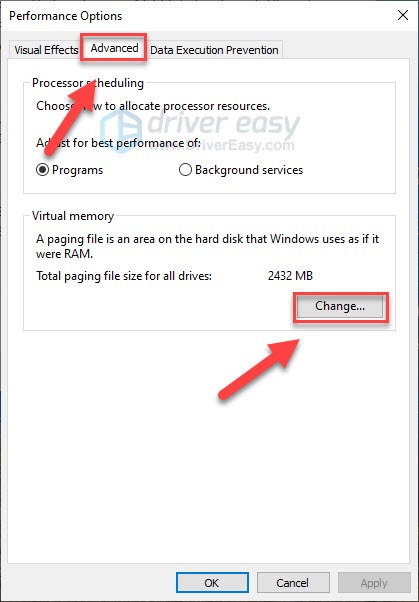
1) On your keyboard, press Windows key and Pause/ Break key at the same time. Then choose Advanced System Settings on the left panel.
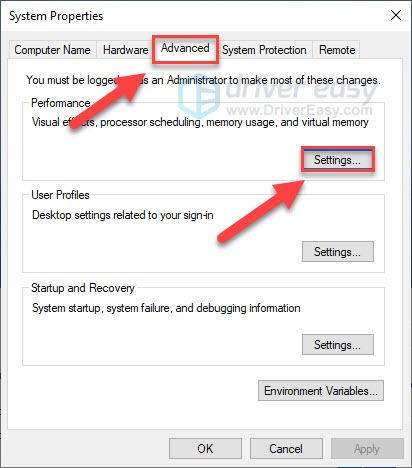
2) Go to the Advanced tab, then click Settings.
3) Go to the Advanced tab again, and choose Change… in the Virtual memory section.
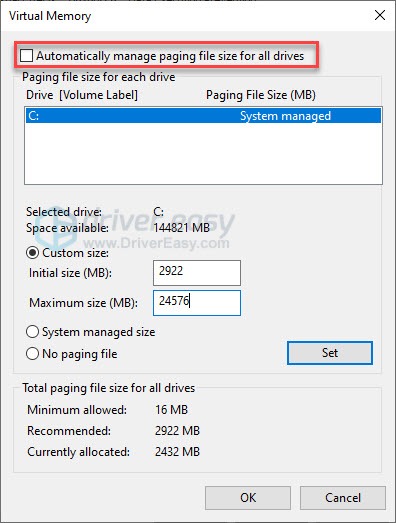
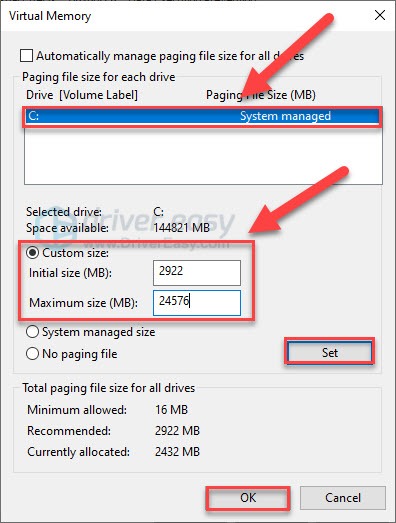
4) Ensure the Automatically manage paging file size for all drives checkbox is NOT ticked.
5) Select your windows drive (the hard drive or partition that has Windows installed on it – usually C:), and enter an Initial size and Maximum size for your virtual memory:
- Initial size – This value varies, depending on your computer. If you’re not sure what value to use, just enter whatever the number is in the Recommended category.
- Maximum size – Don’t set this value too high. It should be about 1.5 times the size of your physical RAM. e.g. A PC with 4 GB (4096 MB) of RAM should have no more than about 6,144 MB virtual memory (4096 MB x 1.5).
Once you’ve entered your virtual memory values, click Set, then click OK to continue.
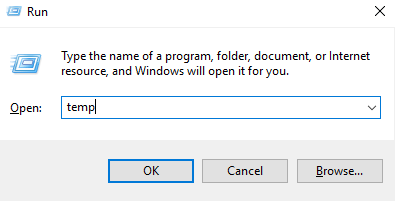
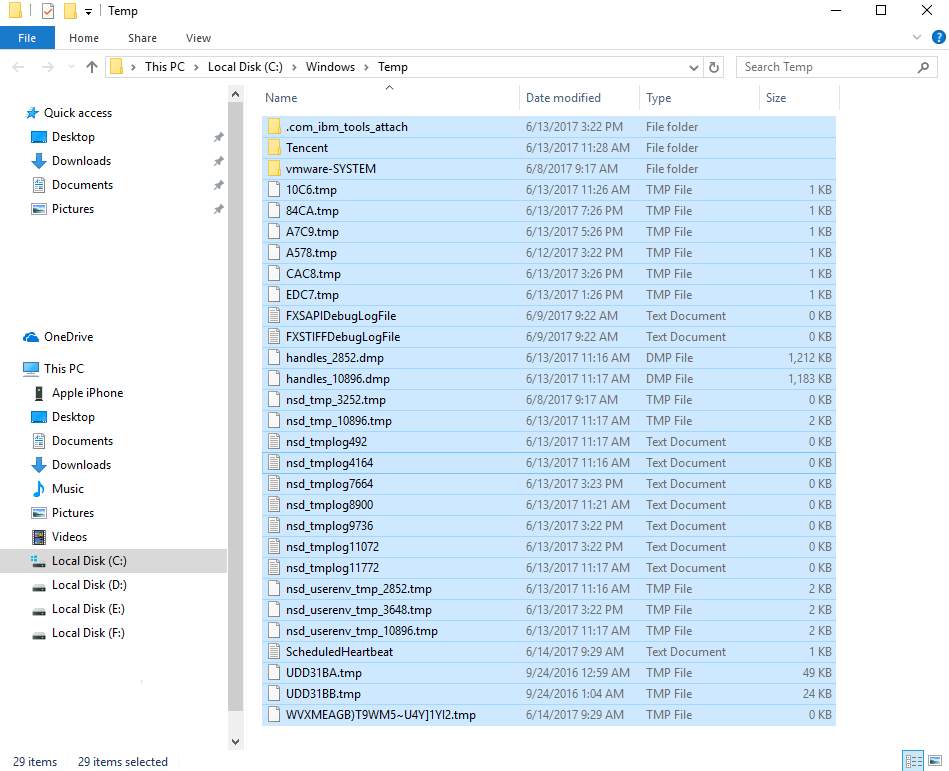
6) Clear all your computer’s ‘temp’ files. On your keyboard, press Windows key and R at the same time, then in the Run form, type temp and hit Enter. This will invoke Windows Explorer with your Temp folder open, showing you all the temp files on your computer.
7) Select all the files in the Temp folder and delete them.
8) Check your computer’s disk usage: Type “task manager” in the Windows search bar and select Task Manager, then in the Processes tab, look at the % at the top of the Disk column. If it’s no longer 100%, you’ve fixed the problem!